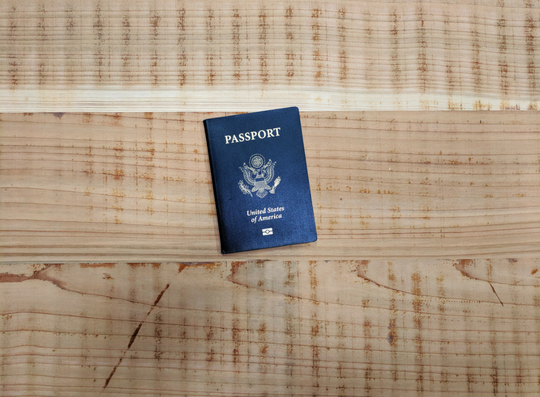
How to Get a U.S. Passport
I got my passport at 27. At the time, I could count the number of people I knew, who held these magical blue books, on one hand. I wasn’t preparing for a trip, but I knew I wanted to travel. I didn’t want to be that one person who got the opportunity to go, and wasn’t ready. If you don’t want to be that person either, you should know that it can take up to 6 weeks for your passport to arrive so don’t wait until the last-minute. Expediting the process is possible, but it will cost you an extra $60*.
Once I was ready to apply for my passport, I went to the passport section of the U.S. State Department website. The site will tell you everything you need to know about the application process. On the site you’ll find out you need a form DS-11 (for new applicants). At the time of publication the form DS-11 was 6 pages long (4/6 are instructions and information). The form tells you that you need.
- Proof of U.S. Citizenship
- Proof of Identity
- A color photo
- Your Fees (fees vary, but there’s a chart)
Your DS-11 tells you what documentation is valid proof of citizenship and identity. It also gives you the requirements for you photo. Complete your DS-11 BEFORE you go to the acceptance site of your choice. Some sites have on-site photo services, and many require an appointment. You can find specifics on the “Passport Acceptance Facility Search Page”. I went to the county clerk’s office since I needed a copy of my birth certificate to complete my application. Because they took photos on site, it was pretty much one stop shopping.
They’ll process everything and in 4-6 weeks you’ll have the legal ability to leave the country. If you have waited until the last-minute, you can pay for expedited service which brings your wait down to 2-3 weeks. If you have questions, the State Department does have an “After I Apply” page. It even lets you track your passport application status.
Once your passport arrives, go ahead and snap your obligatory picture for social media. Now, make some copies of the ID page…yes copies! Why do you need these copies? Because you’re a smart traveler and you know that you should always take a copy of your passport with you when you travel in case something goes down. I’m also cautious when it comes to my papers so I keep copies in my lockbox. When you prepare to travel, be sure to leave one of your copies with someone you trust. This can be a family member, a friend, or pretty much anyone you know will protect the info and answer the phone if you call.
Now, I know you’re proud of your passport, but unless you absolutely need it, it’s better off at home. Losing a driver’s license is a pain in the ass, losing and replacing your passport is another kind of hell. My passport is stored in my lock box (fireproof/waterproof) unless I’ve recently used it for something. This way I always know where it is, and I know it’s safe 99.9% of the time. If you don’t have one of these boxes, it’s definitely worth the small investment.
Hint: Most of the time you aren’t going to need your passport unless you’re traveling internationally. The big exception at this point is going to be those of you who live in states that aren’t REAL ID compliant. You can learn more about the REAL ID Act on the Dept. of Homeland Security site. TLDR; it’s a law created in 2005 setting minimum security standards for state-issued driver’s licenses and ID cards. The law prevents federal agencies from accepting non-compliant licenses and IDs for official purposes.
Time to take your passport for a spin? I recommend a cover. It can protect your passport from the perils of your pockets or travel bag. It also makes it easier to spot in the bottomless pits that most of us call bags.
Tip: Go with a cover that stands out from the inside of the bag you most frequently carry. This keeps your passport visible which makes it easier to grab.
I will note that I had to remove my cover a few times, but that’s super simple. It was worth it to have a place to tuck my boarding passes and to be able to quickly see my passport in my bag. Just remember to put your passport back in your cover, and tuck everything away in a secure but accessible pocket of your carry-on or personal item. If you end up being the kind soul who checks your bag at the gate due to limited overhead space, make sure you take out your passport.
During your trip, you’ll need to show your passport on various occasions; make sure you always get it back and secure it. Once you arrive at your destination, your passport should be secured (unless you have a very good reason to keep it on your person). You can use the room safe, a piece of locked luggage, or a locker with your lock on it (if you’re at a hostel). Your copy should be secure but stored separately from your actual passport. You can use the passport card (if you ordered one) or your state issued ID for identification purposes if needed. You can carry these with your other plastic and conceal them close to the body away from sticky fingers.
That’s it! You know what it takes to secure the book. Now go forth and be great knowing that your passport is safe, and your ass is covered if things get messy.
*All pricing was valid as when this post was made. Please check the U.S. State Department website for the most current information.